




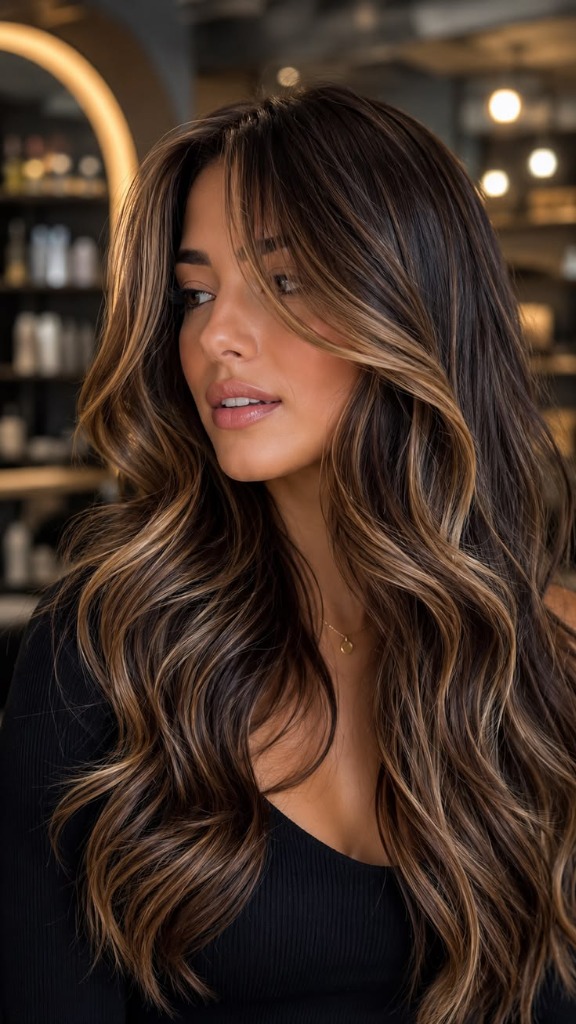

Cascading Butterfly Layers on Long Dark Hair: The Ultimate 90s Bombshell Blowout & Salon Cutting Guide
Master the cascading butterfly layers cut for ultra-long dark brunette hair. Discover salon elevation angles, bouncy 90s blowout techniques, face-framing curtain fringe, and high-shine gloss routines.

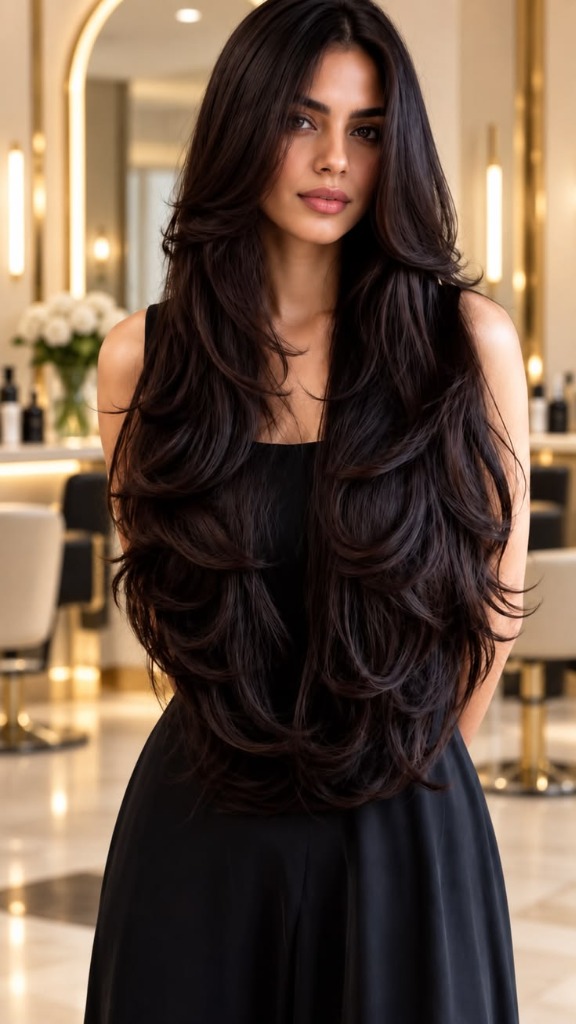
In an era saturated with sleek blunt cuts and understated micro-trims, there is an undeniable, magnetic glamour to voluminous, cascading, multi-tiered hair. Nothing captures this luxury aesthetic more breathtakingly than Cascading Butterfly Layers on Ultra-Long Dark Hair. Characterized by dramatic, feather-light face-framing tiers that sweep gracefully inward and outward like the wings of a monarch butterfly, this iconic haircut injects gravity-defying movement, body, and silhouette definition into heavy brunette tresses without sacrificing precious length.
Featured in our luxury salon editorial, this haircut showcases rich espresso and dark chocolate strands sculpted into undulating waves of dimension. The shorter, chin-grazing and collarbone-length layers frame the jawline and cheekbones, while the longer, mid-back layers create a waterfall of bouncy, seamless volume that dances with every step.
Whether you are preparing for a transformative consultation with your master stylist or seeking to conquer the coveted 90s supermodel blowout at your home vanity, this authoritative 1,500+ word masterclass delivers the complete technical blueprint: cutting geometry, elevation mechanics, round-brush styling tutorials, thermal protection protocols, and aftercare rituals for liquid-mirror brunette shine.
1. Anatomy of the Butterfly Cut: Architecture vs. Traditional Layering
Many clients confuse the Butterfly Cut with traditional long layers, shags, or the 70s wolf cut. However, the Butterfly Cut is a distinct technical hybrid that marries the disconnected internal volume of short hair with the luxurious perimeter density of long locks.
┌────────────────────────────────────────────────────────┐
       │             THE BUTTERFLY CUT ARCHITECTURE             │
       ├────────────────────────────────────────────────────────┤
       │  • Top Crown Tier (Zone 1): Chin to Collarbone Length  │
       │    Provides immediate lift, face contour, and faux-bob  │
       │  • Mid-Length Tier (Zone 2): Chest to Ribcage Feathering│
       │    Creates graduated transition and movement           │
       │  • Perimeter Base (Zone 3): Mid-Back to Waist Length    │
       │    Preserves full perimeter density and heavyweight tip│
       │  • Visual Effect: Bouncy 'Winged' Aerated Volume       │
       └────────────────────────────────────────────────────────┘
The "Two-in-One" Illusion
The true brilliance of the butterfly technique is its dual-nature styling versatility:- The Down-and-Flowing Glamour: When worn open, the graduated tiers blend seamlessly into a voluminous, tumbling waterfall of hair with multi-directional bounce.
- The Faux-Bob Transformation: By pinning or clipping the lowest perimeter layers up beneath the nape of the neck, the shorter top tiers fall forward to simulate a chic, voluminous shoulder-length 90s bob without a single scissor snip to your overall length.
2. Face Shape Mapping & Layer Elevation
A butterfly cut must never be executed with a generic "one-size-fits-all" template. The starting point of your shortest layer must be customized to accentuate your unique bone structure and facial proportions:
OVAL FACE          ROUND FACE         SQUARE JAW         HEART SHAPE
      ┌───────────┐      ┌───────────┐      ┌───────────┐      ┌───────────┐
      │Start Layer│      │Start Layer│      │Start Layer│      │Start Layer│
      │  Cheekbone│      │Below Chin │      │Above Angle│      │Chin-Length│
      └───────────┘      └───────────┘      └───────────┘      └───────────┘
1. Oval Face Shapes
- •Starting Point: High cheekbones.
- •Styling Goal: Sweeping bangs outward right at the zygomatic arch draws the eye horizontally, framing the eyes and adding regal symmetry.
2. Round & Soft Facial Profiles
- •Starting Point: 1 to 1.5 inches below the chin.
- •Styling Goal: Beginning the layers below the widest point of the cheeks elongates the neck and creates a slimming vertical line that draws attention down toward the collarbone.
3. Square & Angular Jawlines
- •Starting Point: Mid-jaw or just touching the clavicle.
- •Styling Goal: Feathered, curved layers curl softly around the mandibles, diffusing sharp jaw angles with romantic, cloud-soft curves.
4. Heart & Inverted Triangle Faces
- •Starting Point: Exact chin level.
- •Styling Goal: Flipping the layers outward right at the narrowest point of the chin visually fills the negative space around the neck, restoring harmonic proportion.
3. The Professional Salon Consultation Script
Walking into the salon and simply asking for "layers" is the fastest route to flat, stringy ends. Use this exact professional dialogue with your hairstylist to ensure absolute alignment:
┌──────────────────────────────────────────────────────────────────┐
  │                 SALON STYLIST CONSULTATION SCRIPT                │
  ├──────────────────────────────────────────────────────────────────┤
  │  • Overall Length: "Please keep my perimeter baseline solid; I   │
  │    want to preserve maximum density at my longest length."       │
  │  • Layer Elevation: "I would like disconnected butterfly layers  │
  │    elevated at 90 to 180 degrees over the crown."                │
  │  • Face Frame: "Start my shortest face-framing tier right at the │
  │    tip of my chin, cascading down in soft concave curves."       │
  │  • Texturizing Technique: "Please point-cut into the ends to     │
  │    keep them airy and feathered; avoid thinning shears that fray │
  │    the cuticle of long dark hair."                               │
  │  • Weight Removal: "Debulk internally through the mid-lengths so │
  │    the hair feels light, but keep the ends weighted and healthy."│
  └──────────────────────────────────────────────────────────────────┘
💡 Stylist Tip: Show photos taken from both the front and back! The way butterfly layers wrap around the shoulders from the back is just as crucial as the face-framing front view.
"Stylist Tip: Show photos taken from both the front and back! The way butterfly layers wrap around the shoulders from the back is just as crucial as the face-framing front view."
— Sarah Jenkins
4. Step-by-Step Tutorial: The Bombshell 90s Blowout at Home
To achieve the salon-fresh, bouncy blowout showcased in our editorial, you do not need an entire glam squad. You need the right sequence of heat, tension, and roller setting.
[ Damp Hair + Mousse ] ──► [ 80% Rough Dry ] ──► [ Round Brush Tension ]
                                                                 │
                                                       [ Cool Shot Setting ]
                                                                 │
                                                       [ Velcro Roller Lock ]
                                                                 │
                                                       [ 20-Min Cooldown ]
                                                                 │
                                                       [ Velvet Drop & Shake ]
Essential Tool Kit Checklist
- •Blow Dryer: Ionic dryer with a concentrated airflow nozzle (1800W+).
- •Round Brush: Large 2.5-inch to 3-inch ceramic or boar-bristle round brush.
- •Rollers: Set of 6 to 8 jumbo (2.5-inch) self-grip Velcro rollers.
- •Styling Products: Lightweight heat protectant spray (up to 450°F), bodifying volumizing mousse, and a nourishing split-end bonding serum.
Phase 1: Prep & Pre-Drying
- Post-Wash Squeeze: Gently squeeze excess moisture from freshly washed hair using a microfiber towel or cotton t-shirt. Never rub vigorously, as wet hair cuticle scales are fragile.
- Apply Foundation Products: Mist thermal heat protectant evenly from roots to tips. Work an egg-sized dollop of volumizing mousse through the roots and mid-lengths to establish an aerated scaffolding.
- The 80% Rough-Dry Rule: Flip your head upside down and rough-dry on medium heat until your hair is approximately 80% dry. Drying hair with a round brush when it is soaking wet leads to mechanical arm fatigue and heat damage.
Phase 2: Sectioning & Round Brush Mastery
- Quadrant Parting: Divide hair into 4 manageable quadrants: Crown (top tier), Left Side, Right Side, and Lower Nape. Clip away three sections.
- Start at the Nape: Take 2-inch horizontal subsections. Place the large round brush beneath the section at the roots. Direct the dryer nozzle downward following the brush to smooth the cuticle. Roll the brush through to the ends, turning the brush inward toward your chest.
- The Cool Shot Lock: Before unrolling the brush, press the blow dryer's cool-shot button for 7 to 10 seconds. Heat reshapes the temporary hydrogen bonds in the hair; cool air instantly locks the new curved shape in place.
Phase 3: The Crown Velcro Roller Setting
- The Over-Direction Secret: For the top butterfly layers, lift the hair vertically straight up toward the ceiling (180-degree over-direction). Blow-dry with high tension.
- Roll Away From the Face: While the section is still piping hot, wrap the ends smoothly around a jumbo Velcro roller and roll backward away from the forehead toward the crown. Pin securely with an alligator clip.
- Cooldown Window: Leave rollers set in your hair for 20 to 30 minutes while completing your makeup routine. The hair must reach room temperature completely before removal.
- The Big Reveal: Gently unroll each roller without pulling. Flip your head upside down, run your fingers (never a brush!) through the roots, shake gently, and flip back. Apply 2 drops of featherweight argan or camellia oil through the ends for mirror-like light reflection.
5. Styling Product & Thermal Protection Matrix
| Product Category | Professional Recommendation | Target Purpose | Application Timing |
|---|---|---|---|
| Volumizing Mousse | Color Wow Xtra Large Bombshell Volumizer | Weightless root scaffolding without crunch | Damp hair roots & mids |
| Thermal Shield | Kérastase Discipline Fluidissime Spray | Protects up to 450°F & blocks humidity | Damp hair before heat |
| Finishing Serum | Olaplex No. 7 Bonding Oil | High refractive index mirror shine | Dry ends post-blowout |
| Texturizing Spray | Oribe Dry Texturizing Spray | Airiness & separation between tiers | Roots & layers mid-day |
| Round Brush | Olivia Garden Ceramic + Ion Thermal 65mm | Smooth glide & anti-static ceramic core | Blowout active phase |
6. Brunette Color Depth & Gloss Chemistry: Liquid Hair Protocols
Dark hair has a distinct optical advantage over blonde hair: its dense melanin core naturally reflects up to 40% more ambient light, creating a glass-like sheen when the cuticle scales lie flat. However, heavy layers can reveal hidden dryness or split ends if not properly nourished.
┌─────────────────────────────────────────┐
                  │    BRUNETTE GLOSS MAINTENANCE CYCLE     │
                  ├─────────────────────────────────────────┤
                  │ Week 1: In-Salon Clear Acidic Color Glaze│
                  │ Week 2: Deep Moisture Peptide Mask      │
                  │ Week 3: Apple Cider Vinegar Clarifying  │
                  │ Week 4: Bond-Building Protein Infusion  │
                  └─────────────────────────────────────────┘
Acidic Gloss Treatments
Ask your salon for an **in-salon clear acidic gloss** (such as Redken Shades EQ 000 Crystal Clear). Unlike alkaline permanent dyes that lift the hair cuticle, acidic glosses coat the exterior fiber, closing the cuticle tightly and lowering the hair’s pH back to its healthy acidic sweet spot (4.5 to 5.5). This traps light inside the hair shaft, giving cascading dark butterfly layers their signature liquid-chocolate radiance.Avoiding "Split End Halo" on Dark Hair
Because light-colored split ends stand out dramatically against an espresso base, schedule **dusting appointments every 8 to 10 weeks**. Dusting removes only 1/8th of an inch of damaged fiber without sacrificing the structural cascading length of your butterfly cut.7. Day-to-Night Styling Variations
The cascading layers of this haircut lend themselves effortlessly to multiple editorial styles:
╭─────────────────────────────────────────╮
               │     3 VERSATILE BUTTERFLY VARIATIONS    │
               ├─────────────────────────────────────────┤
               │  1. The 90s Claw-Clip Half-Up Fountain  │
               │  2. The Hollywood Old-Money Side Sweep  │
               │  3. The Sculpted High Bouncy Ponytail   │
               ╰─────────────────────────────────────────╯
1. The 90s Claw-Clip Half-Up Fountain
Gather the shorter top layers and secure them at the crown with an oversized tortoiseshell or tortoiseshell-and-gold claw clip. Allow the feathered ends to fountain over the clip, while the longer bottom layers cascade down your back. This style provides effortless retro sophistication in under 60 seconds.2. The Hollywood Old-Money Side Sweep
Deep-part your hair on one side, sweeping all cascading layers over a single shoulder. Tuck the opposite side behind your ear and secure it with a concealed bobby pin. The undulating waves will stack on top of one another, creating an opulent, red-carpet-worthy volume wall.3. The Sculpted High Bouncy Ponytail
Pull your long hair into a high ponytail anchored at the crown. Because your shortest butterfly layers are disconnected, leave the chin-length curtain bangs loose to frame your face. The ponytail itself will erupt with tiered, bouncy volume rather than hanging flat like a standard ponytail.8. Preserving Health & Density in Long Dark Hair
Maintaining cascading layers at hip or mid-back length requires conscious daily preservation:
- Silk Pillowcase Rule: Cotton pillowcases generate friction that frays delicate feathered ends overnight. Sleeping on a 100% 22-Momme Mulberry silk pillowcase allows layers to glide without frizz.
- The Loose Pineapple Bun: Before bed, gather hair onto the very top of your head and secure it loosely with an oversized satin cloud scrunchie. When you let it down in the morning, your roots will retain natural lift, and your curled ends will be protected from body heat and tossing.
- Hydrating Scalp Serums: Healthy hair begins at the follicle. Massage a stimulating rosemary, peptide, or caffeine scalp serum into your scalp 3 nights a week to encourage resilient, dense hair growth.
9. Frequently Asked Questions (FAQ)
Q: Does the butterfly cut work on fine or thin hair?
Yes, but with crucial adjustments! On fine hair, the stylist should avoid cutting too many disconnected tiers, which can make the perimeter ends look sparse or see-through. Instead, request a "soft butterfly" with fewer interior layers and a reinforced blunt perimeter line to maintain the appearance of density.Q: How often should butterfly layers be trimmed to maintain the shape?
To preserve the crisp face-framing bounce and prevent the layers from growing down into an indistinguishable single length, schedule a layer maintenance trim every 8 to 12 weeks.Q: Can I air-dry a butterfly haircut and still get volume?
Air-drying a butterfly cut creates a gorgeous, soft bohemian wave! To enhance natural texture without heat, apply a leave-in conditioning curl cream, twist the face-framing layers away from your face into two loose rope twists, and allow them to dry naturally before unraveling with a drop of hair oil.Q: How do I keep my blowout from collapsing in humid weather?
The secret is locking the hair cuticle with cool air and an anti-humidity finishing shield. Ensure each section is 100% dry before taking down rollers (any residual moisture will cause hair to frizz and drop), and mist with an anti-humidity hairspray formulated with polymer moisture barriers.Final Thoughts: The Timeless Allure of Voluminous Brunette Hair
The Cascading Butterfly Layers on Long Dark Hair represent the pinnacle of modern hair luxury: effortless movement, versatile face-framing architecture, and rich, light-catching depth. It breathes new life into long locks, proving that you never have to choose between length and volume.
Take this guide to your salon, embrace the power of the round brush, and let your hair make an unforgettable statement wherever you go!