




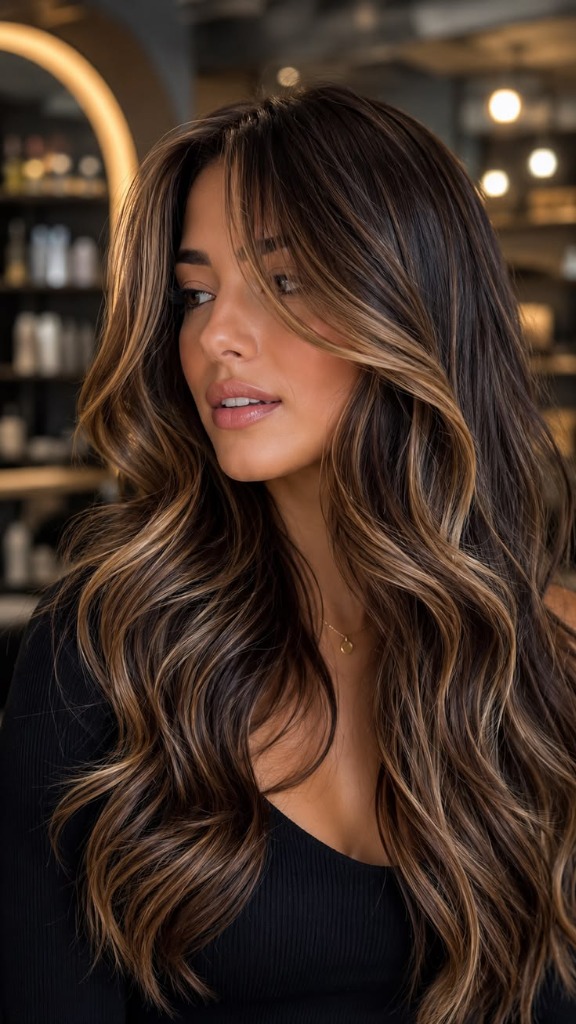

The Modern Textured Pixie Cut 360 Guide: Front, Profile, Back Views & Trend Color Inspo
Master the modern textured pixie haircut with our complete 360-degree guide. Discover front, side, and tapered back view mechanics, salon cutting formulas, styling waxes, and stunning hair color variations.

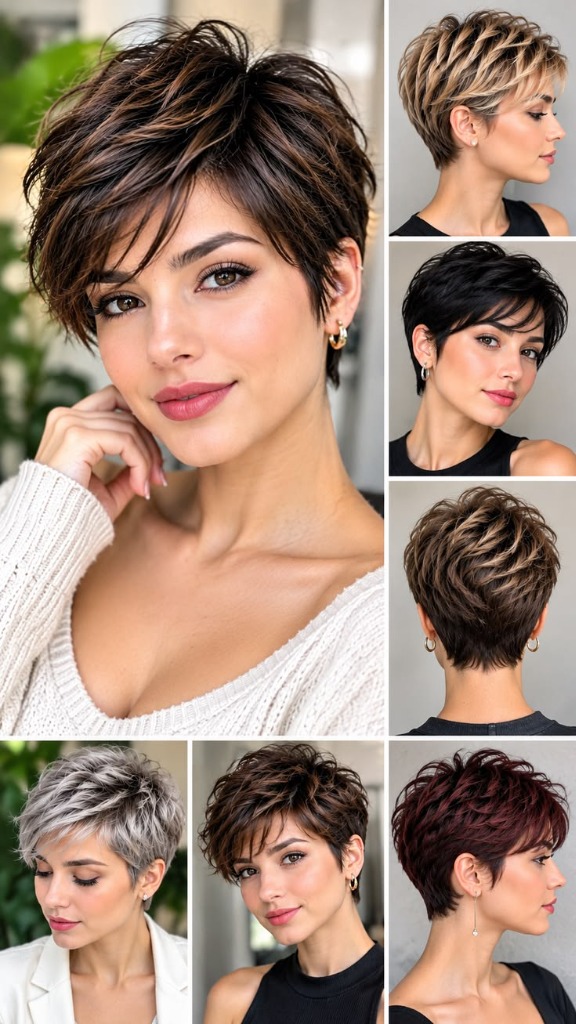
Few haircuts possess the transformative power, effortless chic, and facial-bone-sculpting magic of a Modern Textured Pixie Cut. Far from the rigid, flat crops of decades past, today's contemporary pixie (often celebrated as the textured bixie or feathered crop) is an architectural masterpiece of soft, piecy volume, sweeping side bangs, and an impeccably tapered nape.
Featured in our multi-perspective editorial portfolio, this definitive visual guide reveals every single angle of the modern pixie:
- •The Front Profile: Tousled, touchable volume with long, wispy bangs that brush past the eyebrows and soften the cheekbones.
- •The Profile View: A delicate graduation from crown volume down to tapered sideburns that wrap gracefully around the ears, highlighting dainty hoop earrings and facial bone structure.
- •The Back View: The crown stacked with dimensional, feathered layers transitioning seamlessly into a clean, soft-feathered nape.
- •The Color Variations: From multidimensional brunette highlights and warm blonde balayage to jet black, icy silver ash, and rich wine-burgundy tones.
1. The Anatomy of the Modern Textured Pixie: 360-Degree Architecture
What separates an extraordinary, salon-fresh textured pixie from an unflattering cut is how the three distinct zones of the head harmonize together:
┌────────────────────────────────────────────────────────┐
       │             THE 360-DEGREE PIXIE ARCHITECTURE          │
       ├────────────────────────────────────────────────────────┤
       │  • Zone 1 (Crown & Top): 3 to 4 inches of feathered    │
       │    point-cut layers providing aerated lift and height  │
       │  • Zone 2 (Fringe & Temples): Elongated asymmetrical   │
       │    curtain bangs sweeping across the forehead          │
       │  • Zone 3 (Nape & Occipital): Softly tapered baseline  │
       │    hugging the curve of the neck without blunt clippers│
       │  • Silhouette: Effortless, Textured, Modern, Sculpted  │
       └────────────────────────────────────────────────────────┘
The Three Cardinal Views Explained
- The Front View (Feminine Softness): By keeping the top layers longer and allowing the fringe to graze the eyebrows, the front profile retains soft, feminine framing. It avoids exposing the forehead completely, creating a youthful, modern look.
- The Profile View (Bone Structure Elevation): From the side, the cut creates a diagonal upward lift from the nape to the crown. This visual diagonal draws the eye upward, instantly lifting the appearance of the jawline and cheekbones.
- The Back View (The Precision Nape): The back view reveals the secret to an expensive-looking haircut. The hair at the occipital bone is layered with soft graduation, tapering into a natural point-cut hairline that flatters the curve of the neck.
2. Face Shape Mapping: Customizing the Pixie for Your Proportions
A pixie cut should never be a carbon-copy cut; it must be tailored to highlight your best facial assets:
OVAL FACE            ROUND FACE           HEART FACE          SQUARE JAW
       ┌───────────┐        ┌───────────┐        ┌───────────┐        ┌───────────┐
       │Balance: Any│       │Lift: High │       │Bangs: Soft │       │Edges: Whispy│
       │Fringe Style│       │Crown Volume│      │Side-Swept  │       │Temples Soft│
       └───────────┘        └───────────┘        └───────────┘        └───────────┘
1. Round Face Profiles
- •Styling Strategy: Maximize vertical height at the crown while keeping the sides tight against the head.
- •The Effect: Elongates the face visually, drawing attention vertically toward the eyes rather than the cheeks.
2. Heart-Shaped & Inverted Triangle Faces
- •Styling Strategy: Opt for long, piecy, side-swept bangs that graze the cheekbone.
- •The Effect: Softens a wider forehead and brings visual balance to a pointed, delicate chin.
3. Square & Angular Faces
- •Styling Strategy: Incorporate soft, feathered layers around the ears and avoid sharp horizontal blunt lines.
- •The Effect: The organic, cloud-like texture diffuses angular jaw corners with effortless feminine grace.
4. Oval & Symmetrical Faces
- •Styling Strategy: Complete freedom! You can wear the bangs forward, brushed to the side, or pushed back into a sleek wet-look crop.
3. The Professional Salon Consultation Script
Walking into the salon and simply saying "give me a pixie" is risky. Take this exact professional terminology to your master stylist:
┌──────────────────────────────────────────────────────────────────┐
  │                 SALON STYLIST CONSULTATION SCRIPT                │
  ├──────────────────────────────────────────────────────────────────┤
  │  • Crown Length: "Please keep the top layers at 3.5 to 4 inches  │
  │    so I have enough length to create piecy, textured movement."  │
  │  • Fringe Request: "I want an elongated, side-swept curtain fringe│
  │    that blends into my temples."                                 │
  │  • Nape Technique: "Please point-cut or razor-taper the nape so  │
  │    it has a soft, lived-in edge. Avoid hard electric clipper box │
  │    lines at the hairline."                                       │
  │  • Internal Texture: "Debulk internally using slicing shears or  │
  │    slide-cutting to create airiness without thinning the ends."  │
  └──────────────────────────────────────────────────────────────────┘
💡 Stylist Tip: Show all angles of our guide photo! Seeing the back and side views allows your stylist to visualize the weight distribution and occipital transition before making the first cut.
"Stylist Tip: Show all angles of our guide photo! Seeing the back and side views allows your stylist to visualize the weight distribution and occipital transition before making the first cut."
— Sarah Jenkins
4. Color Dimension: How Hair Color Enhances Pixie Texture
As illustrated in our visual collage, short hair offers an incredible playground for dimensional color:
| Color Palette | Visual Effect on the Pixie Cut | Maintenance Level |
|---|---|---|
| Dimensional Chestnut / Mocha | Rich natural warmth; subtle babylights highlight piecy layers | Low (Every 10 - 12 weeks) |
| Blonde Balayage & Shadow Root | High contrast; dark base creates depth beneath bright tips | Medium (Every 6 - 8 weeks) |
| Jet Black / Espresso Gloss | Architectural, editorial, striking emphasis on eye color | Low (Every 8 weeks) |
| Icy Silver / Platinum Ash | Edgy, high-fashion statement; luminous light reflection | High (Every 4 - 6 weeks) |
| Rich Burgundy / Wine Red | Warm autumn glow; brings out olive and golden skin undertones | Medium (Every 6 weeks) |
5. Daily 5-Minute Styling Masterclass: Texture Paste Mechanics
The greatest superpower of a textured pixie is its speed. You can style your hair from towel-damp to red-carpet ready in under five minutes:
[ Damp Hair + Volumizing Tonic ] ──► [ Flat-Wrap Blowout with Fingers ]
                                                        │
                                          [ Nickel-Sized Matte Pomade ]
                                                        │
                                          [ Rub Warmly in Palms ──► Rake & Pinch ]
Essential Tool & Product Kit
- •Dryer: Lightweight travel or ionic hair dryer without heavy attachments.
- •Styling Medium: Matte-finish texturizing paste, dry clay, or flexible molding pomade (e.g., Oribe Rough Luxury or Kevin Murphy Night.Rider).
- •Finishing Spray: Lightweight flexible-hold hairspray or dry texturizing spray.
Step-by-Step Styling Tutorial
- The "Flat-Wrap" Technique: Using your hands or a flat vent brush, blow-dry your hair by wrapping it around the curvature of your head in alternating directions (left to right, then right to left). This flattens the cuticle and eliminates cowlicks at the crown.
- The Product Warmup: Take a dime-sized amount of texturizing matte paste. Rub it between your palms vigorously until it is clear and warm. Cold paste creates sticky, clumping patches.
- The "Rake & Pinch": Rake your hands through your hair from back to front, depositing product evenly at the roots. Then, use your thumb and index finger to pinch individual small sections of hair at the crown and fringe, twisting the ends slightly to create distinct, piecy ribbons.
- Smooth the Nape: Use your palms to press the hair at the nape of your neck down against your skin for a clean, sharp silhouette.
6. Accessorizing & Makeup: Framing the Face with Confidence
When you cut off long hair, your facial features and accessories instantly take center stage:
╭─────────────────────────────────────────╮
               │      PIXIE BEAUTY ENHANCEMENT MATRIX    │
               ├─────────────────────────────────────────┤
               │  • Earrings: Petite Gold Hoops or Studs │
               │  • Brows: Structured, Groomed Arches    │
               │  • Cheeks: High-Placement Cream Blush   │
               │  • Neckline: V-Neck Knits & Off-Shoulder│
               ╰─────────────────────────────────────────╯
The Power of Earrings
With your ears exposed, earrings become an essential styling component. Thin gold hoops (as seen in our featured model's main photo) draw light to the jawline and give the haircut an effortlessly chic, feminine balance.High-Placement Blush
Sweep your cream or liquid blush slightly higher on the cheekbones, blending up toward the temples. The upward angle of the pixie cut paired with high blush placement creates an instant non-surgical face-lift effect.7. The Grow-Out Blueprint: Transitioning Without the "Awkward Phase"
If you ever decide to grow your pixie cut out into a bob or lob, follow this strategic roadmap:
- Keep Trimming the Nape: The number one mistake people make when growing out a pixie is letting the back hair grow unchecked into a mullet! Every 6 weeks, have your stylist trim only the nape, allowing the top and side layers to catch up to the neckline.
- Transition into a French Bob: Once your top layers reach your earlobes and the nape is even, you have officially transitioned into a chic French bob with zero awkward intermediate stages!
8. Frequently Asked Questions (FAQ)
Q: Will a pixie cut make my face look rounder or bigger?
Quite the opposite! A properly cut textured pixie with crown volume and wispy sideburns actually elongates the face and accentuates the cheekbones. By removing heavy hair that drags the face down, your facial bone structure appears higher, sharper, and more defined.Q: How often does a textured pixie need to be trimmed?
To keep the nape clean and the fringe at the ideal eye-grazing length, schedule a quick 20-minute maintenance trim every 4 to 6 weeks.Q: Can I style a pixie cut without using heat or blow-dryers?
Yes! On warm days, apply a dollop of leave-in conditioning mousse to damp hair, comb the sides and nape flat against your head, finger-tousle the top layers, and allow it to air-dry naturally into an effortless, lived-in Parisian crop.Final Thoughts: The Ultimate Expression of Feminine Confidence
The Modern Textured Pixie Cut is more than just a hairstyle—it is a bold, refreshing declaration of personal style and confidence. By shedding heavy layers and embracing sculpted, touchable texture, you unlock a timeless look that saves you hours of daily styling while keeping you radiant from every single angle.
Take our 360-degree guide to your salon, embrace the chop, and enjoy the liberating beauty of the modern textured crop!